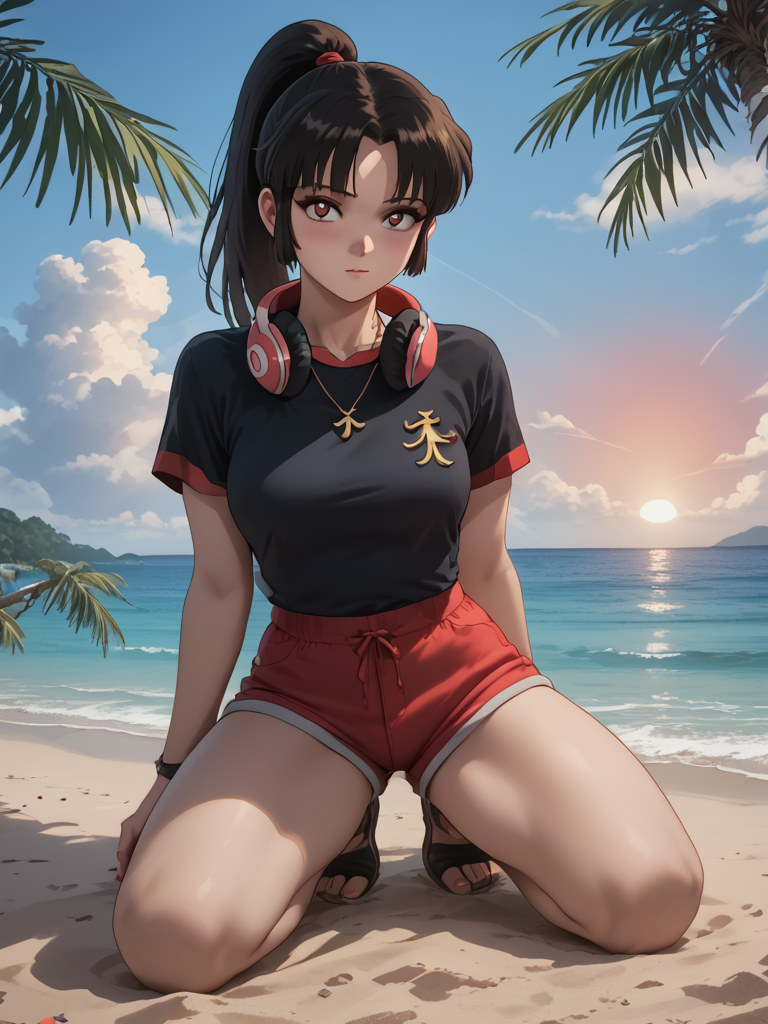
This ComfyUI workflow shows how to use the Visual Area Prompt node for regional prompting control. This node can be used with SD 1.5, SDXL, PonyXL, Flux and any other models.
Requirements
- ComfyUI Manager: Recommended to manage plugins
- Visual Area Prompt extension nodes
- Rgthree’s ComfyUI Nodes: Optional, used for the Power Lora Loader node
- Subject LoRA: Optional, used as main subject (Sango from the Inuyasha anime)
Here’s a brief explanation of the involved nodes for area conditioning prompt, skipping the regular nodes that are required for any workflow as usual.
Power Lora Loader (rgthree)
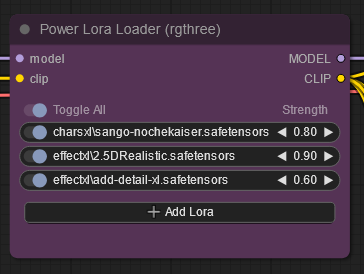
This is an optional node to load unlimited LoRAs with their respective weights. You can of course replace it with the regular Load Lora nodes, or don’t use any LoRA at all if not needed.
Clip Text Encode (x4)
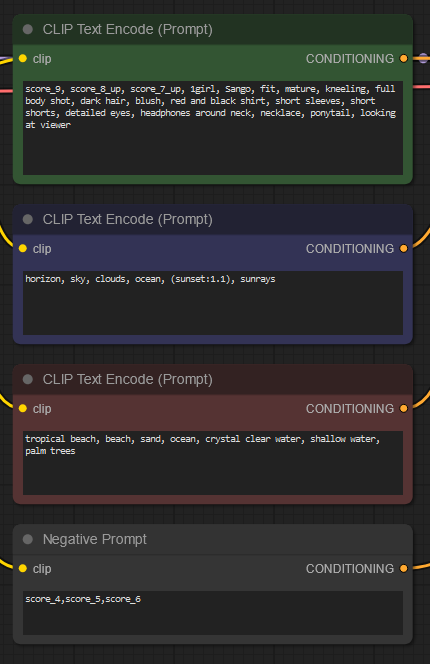
Here we have added four nodes to describe our image in prompts as follows:
- The full image area, including your score prompts
- The top area as defined by the Visual Area Prompt node’s coordinates
- The bottom area as defined by the Visual Area Prompt node as well
- The negative prompt
Visual Area Prompt
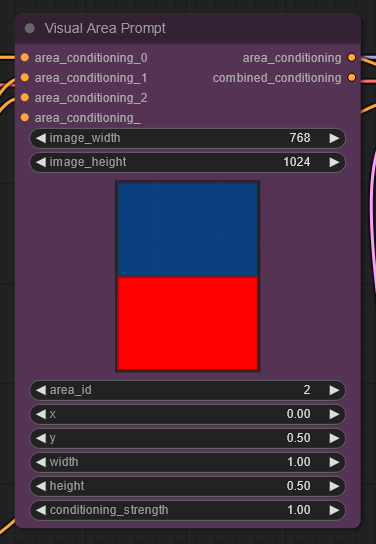
A node that allows for area prompting with a graph displaying the areas affected by the conditionings. There are three conditioning inputs when used:
- area_conditioning_0: Connected to the first CLIP Text Encode node.
- area_conditioning_1: Connected to the second Text Encode node, defines the top-half area of the image.
- area_conditioning_2: Connected to the third Text Encode node, defines the bottom area of the image.
The rest of the widgets within the node are used to define the areas of each of the area conditionings. The id widget is used to choose which area to affect, while the other values change the area’s size and position.
There are also two outputs:
- area_conditioning: This is what all the combined conditionings and areas will result in.
- combined_conditioning: This is all the provided conditionings in a single conditioning.
In our workflow, we have connected the node’s combined_conditioning output to our KSampler node. However, you may get more accurate results by using the area_conditioning instead. Here’s a comparison of our sample workflow using each output mode.
- area_conditioning output
- combined_conditioning output
Final remarks
The Visual Area Prompt node’s output is not what we would call an exact science. Don’t be surprised if the KSampler blatantly ignores parts of your prompts. The key to achieve the desired results is to avoid too many areas and keep prompts as concise as possible.
🔻Download JSON workflow
Disclaimer
The content in this post is for general information purposes only. The information is provided by the author and/or external sources and while we endeavour to keep the information up to date and correct, we make no representations or warranties of any kind, express or implied, about the completeness, accuracy, reliability, suitability or availability with respect to the website or the information, products, services, or related graphics contained on the post for any purpose. Some of the content and images used in this post may be copyrighted by their respective owners. The use of such materials is intended to be for educational and informational purposes only, and is not intended to infringe on the copyrights of any individuals or entities. If you believe that any content or images used here violate your copyright, please contact us and we will take appropriate measures to remove or attribute the material in question.


